Article
How to Prepare Your Home for Solar Installation
For many homeowners, solar energy is the key to reduced utility costs and increased sustainability. Long-term savings – like smaller electric bills, tax credits, and boosted property values – as well as a smaller carbon footprint – make renewable energy systems highly attractive. In order to reap these rewards, you must first prepare your home for solar installation by understanding your average energy consumption, finding appropriate photovoltaic panels, and ensuring the structural integrity of your roof.
So, what do you need to do before installing solar panels, and how long can you expect the solar installation process to take? Join us for a solar installation checklist that covers each step to take before you can enjoy the benefits of solar energy.
Step 1: Solar Installation Checklist: Evaluate Your Home’s Solar Potential
Every property is different, so you’ll need to assess certain features of your home to determine your solar potential. Here are a few factors you’ll want to consider as you prepare your home for solar installation:
- Roof’s slope and orientation
- Age and potential lifespan of your existing roof
- Amount of direct sunlight vs. shade your home receives
- Your average energy consumption
A structural engineer or qualified solar installation expert can inspect your home for a better understanding of its solar potential, and you may find that a home energy audit gives you a good starting point for many of these aspects. If your roof isn’t compatible with solar, a ground-mounted array might be a good alternative.
The US Department of Energy offers a number of resources to help you calculate your home’s solar potential, which can be particularly beneficial if you’re installing your own solar array.
Step 2: Choose the Right Solar Panel System
Your energy needs, available space, and budget will all impact the type of solar panel system you choose. In addition to panels, adequate battery storage can maximize the benefits of your solar array
There are three primary types of solar panels on the market. Let’s take a brief look at each one:
Monocrystalline
Monocrystalline solar panels are often considered the gold standard of photovoltaics. These powerhouses have efficiency ratings between 15% and 24% and can last 40 years or more with proper maintenance. For reference, the most efficient solar cell ever created topped out at 39.5%, but it isn’t available for standard residential solar panels.
The downside is that monocrystalline panels are also the most expensive models on the market. However, most people can get by with a smaller array due to their unmatched output.
Polycrystalline
The next solar panel commonly found on rooftops is composed of polycrystalline cells. These models are less efficient than their monocrystalline counterparts, converting between 13% and 16% of available sunlight into usable energy. They have average lifespans of 20 to 35 years.
Polycrystalline solar panels are less expensive than mono-varieties, so you’ll need more of them to match the power of a smaller monocrystalline array.
Thin Film
Finally, thin-film solar panels are typically used for recreational vehicles and other portable systems that require a lightweight energy array. They’re discreet, flexible, and affordable, but they don’t offer the power or efficiency of sturdy mono- and polycrystalline panels, with a maximum efficiency rating of around 13%. They’re also less durable, so you won’t get an extended lifespan out of them.
Step 3: Verify Your Roof’s Suitability
The average solar panel system will last at least 25 years, so assessing your roof’s integrity and lifespan is essential as you prepare your home for solar installation. After all, mounting a shiny new solar array on a foundation that needs to be replaced in 5 to 10 years can create a major headache.
Even with a brand-new, fortified roof, the slope, orientation, and foundation materials should also be conducive to a solar installation. A qualified solar technician can ensure that your roof meets certain standards before you take the plunge.
Step 4: Obtain Necessary Permits and Approvals
A legitimate solar technician can help you navigate local regulations and permits as you prepare your home for solar installation, but if you’re mounting your own array, you’ll need to do quite a bit of research before beginning this project.
Here are some of the authorities you or your technician should contact as you prepare your home for solar installation:
- Utility company
- City, county, and state oversight boards
- Homeowners association (HOA) representatives
- Homeowners insurance provider
- Home or roof warranty providers
Numerous financial incentives are available to homeowners who install renewable energy systems on their property. Ensure your new solar installation meets eligibility requirements for state and federal tax breaks, rebates, and net metering programs.
At Solar Energy World, we handle all the necessary permits and approvals, ensuring your solar installation is compliant and ready to go. Let us take care of the details so you can focus on the savings. Contact us today to get started!
How Solar Panels Keep You Powered During Outages
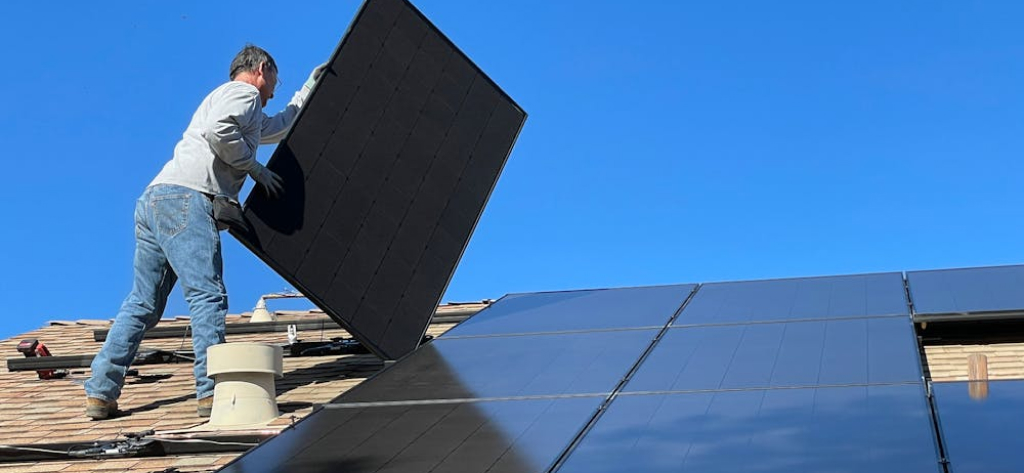
Step 5: Prepare the Installation Site
Before your solar installation crew arrives, you’ll want to prepare your home and yard for the big day. Move any portable objects away from the base of your home, where technicians may place ladders and scaffolding or stage equipment. This is a good time to clear debris from gutters and remove any limbs or leaves that have settled on your roof. It’s also wise to ensure your breaker boxes and other electrical components are easily accessible.
If you’re working with a professional installation company, they will assess your home’s existing electrical components before scheduling installation. However, if you’re DIYing your system, make sure that any necessary electrical upgrades are completed before mounting your panels.
Step 6: Work with a Reputable Solar Installer
While it’s technically possible to DIY your home solar installation, there are plenty of good reasons to work with a licensed solar contractor. An experienced, reliable solar installer with valid certification, such as those from the North American Board of Certified Energy Practitioners® (NABCEP®), can drastically reduce the risks of installation errors and dangerous missteps associated with do-it-yourself jobs. Remember, you’ll be working with your home’s electrical system, so one wrong move could be deadly.
A licensed professional can offer plenty of benefits beyond mitigating potential safety concerns. For instance, they can take care of permits and paperwork required by your local utility board or building oversight committee and help you navigate the complex paperwork needed for tax credits, grants, and other financial incentives. Finally, your local building code might stipulate that solar installations must be professionally installed. DIY installation could void your homeowner’s insurance, roof warranty, or other binding legal agreement.
Step 7: Prepare for Installation Day
Most solar installations can be professionally installed in 1 to 2 days. Still, planning ahead can help you mitigate any potential disruptions. Start by confirming that all permits and paperwork are completed and filed with the appropriate entities. Reach out to your installer to verify the expected timeline and installation schedule. Then, read over your installation contract and review your financing agreement to ensure all the boxes are checked.
As you prepare your home for solar installation, remember to prepare yourself, too. You’ll likely encounter moderate noise levels as technicians navigate your roof and securely install your new solar array. Finding a quiet place to spend your day, like a library or coffee shop, may help you avoid unnecessary frustration, especially if you work from home. However, you’ll want to be accessible in case any issues arise during installation. Be sure your solar technicians have your number if you’ll be away from home.
Economic and Environmental Benefits of Solar Energy
A properly sized solar panel array can drastically reduce your monthly utility costs by offsetting the energy you draw from the grid. In fact, the right solar panel system can save you as much as 100% of your average electrical costs. And that isn’t the only return on your solar investment! Here are some of the other long-term financial incentives for a residential solar installation:
- State and federal tax breaks
- Local rebates
- Solar renewable energy certificates (SRECs)
- Net metering
- Increased property value
Of course, you’ll also enjoy improved sustainability and a smaller carbon footprint. Each kilowatt-hour of energy your system generates offsets electricity that would otherwise come from fossil fuels. In turn, you’ll minimize your reliance on the aging electrical grid and take another step toward energy independence.
Your Home Solar System Preparation Guide
Learning how to prepare your home for solar installation is the first step to a more sustainable household and a wide variety of financial benefits. Although you might be able to mount and wire your own solar array, a professional installation expert can take a lot off your plate by obtaining permits, navigating legal requirements, and helping you complete paperwork for many of those critical financial incentives.
At Solar Energy World, we’re committed to bringing renewable energy to all! Contact us today for a free solar estimate.
Want a Free Solar Estimate?
Fill out the form to get started today.